序言 学习Vue主要是因为,之前经过软工老师的介绍结识了一家公司,他们想要一款处理他们业务的系统,而前端界面分配给了我跟帅彬,所以为了加快开发速度,就准备学习Vue前端框架 。
一些重要的综合性的Demo我已经上传到了github
Vue基础入门 基础知识:
HTML +JavaScript +CSS Node 环境和npm (依赖管理 )webpack (可选)
学习任何框架,最好的教程就是官方文档,但是官方文档往往是英文的,可能会劝退:( 建议提升英文:)
初学者更适合视频学习,等有一定能力便可以向文档进发,因为更加详细:)
Document Object Model ,简称DOM,中文叫做“文档对象模型 ”
粗略理解就是:
DOM提供了对文档的结构化表述。从HTML或者xml程序中,对其结构进行访问,以及修改文档的结构、样式和内容,也就是可以对文档结构实现读写功能。(web页面与其源码都被称作是文档)
DOM 的实现 要想实现将js代码中的数据呈现到HTML页面上用DOM实现:
1
2
要先获取document/DOM,再获取节点,然后再去操作这个DOM节点(也就是在HTML中进行一系列的操作)。 而使用Vue可以直接在html程序中绑定数据,当我们改变js中的数据时,就可以直接在页面上呈现出来
Vue相比于DOM的优点 要想实现将js代码中的数据呈现到HTML页面上,采用Vue可以让这个过程简化许多。
先创建Vue实例:
1
2
3
4
5
6
7
//创建VUE实例 new Vue({ el:"#app", //选择器 data:{ message:"我喜欢你" } })
然后将此实例和HTML中的<div>绑定到一起
1 2 3 <div id ="app" > <h1 > {{meaasge}}</h1 > </div >
所以,以后我们要在HTML里面用js的数据,就直接写相应的数据名称就可以了,让数据和页面形成一个绑定,我们只要操作数据,页面自己就会跟着变化。
入门知识点
文本:双花括号
属性:v-bind:
可省略,只写冒号:
事件:v-on:
可省略,只写@
注:如果要在函数里面使用Vue中的数据,可以使用this来访问
举例:
1 2 3 4 5 6 7 8 9 10 11 12 13 14 15 16 17 18 19 20 21 22 23 24 25 26 27 28 <div id ="app" > <h1 > message</h1 > <img v-bind:src ="url" > </img > <img :src ="url" > </img > <button v-on:click ="" > </button > <button @click ="" > </button > </div > <script > new Vue({ el:"#app", data:{ message="我喜欢你", url="inmages/1.jpg" }, methods:{ sayLoveYou(){ alert("Love you!") } //Vue里的函数集合:methods,包含多个函数 //数据集合:data,包含多个变量数据 } }) </script >
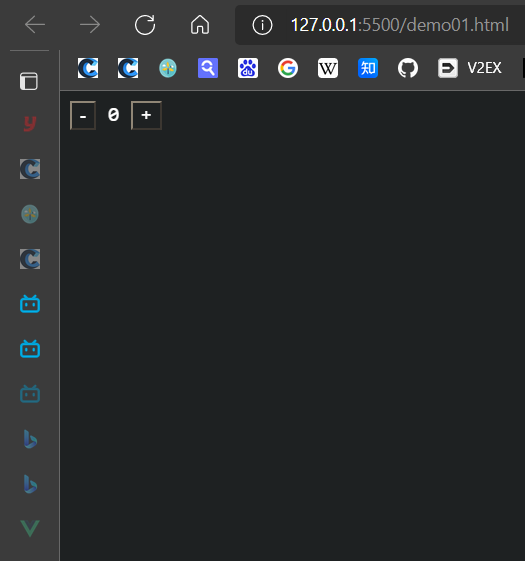
小练习:做一个翻页按钮
1 2 3 4 5 6 7 8 9 10 11 12 13 14 15 16 17 18 19 20 21 22 23 24 25 26 27 28 29 30 31 32 33 <body > <div id ="app" > <button @click ="sub" > -</button > <span > {{ number }}</span > <button @click ="add" > +</button > </div > <script src ="https://cdn.jsdelivr.net/npm/vue@2.6.14/dist/vue.js" > </script > <script > new Vue({ el :"#app" , data :{ number :0 , }, methods : { add ( this .number=this .number+1 ; }, sub ( if (this .number==0 ){ alert("不可以小于零" ) } else this .number-- } } }) </script > </body > </html >
效果:
创建Vue项目 配置开发环境 使用Node.js环境开发,
cmd安装vue/cli
创建项目hello,建议在对应的目录下创建
启动服务器
1
2
3
4
5
命令: npm install -g @vue/cli vue create hello cd hello npm run serve
组件化开发概述 什么是组件化呢? 就是我们在html中进经常要用到标签,但是总有我们需要的标签HTML提供不了,所以,组件化开发就是,我们开发的.vue文件(又叫vue组件)作为html中的标签来使用。
例如我们可以开发.vue登录组件或者.vue轮播图组件然后插入到HTML中
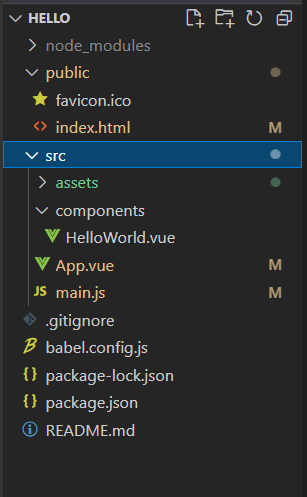
优点:简洁与复用 项目结构概述
后缀.vue是我们上文中提到的组件,
main.js是主文件,用于对应id与对应的组件(App.vue)
components意为组件,一般我们自己开发的,也就是自定义的组件就放在这个目录下
剩余的一些为配置文件,
在这个vue中,我们可以写html、JavaScript、CSS代码,分别对应的是<template></template>、<script></script>、<style></style>
例如:
1 2 3 4 5 6 7 8 9 10 11 12 13 14 15 16 17 18 19 20 21 22 23 24 25 26 27 <template > <div id ="app" > <h1 > I lOVE You</h1 > <img alt ="Vue logo" src ="./assets/friend_404.gif" > <h1 > {{message}}</h1 > </div > </template > <script > export default { data ( return { message : "Hello world" , } } } </script > <style > </style >
引入vue.js文件与Node环境下书写格式的区别
引入vue.js:
1
2
3
data:{ message:"我喜欢你!" }
Node环境下:
1
2
3
4
5
data(){ return{ message: "Hello world", } }
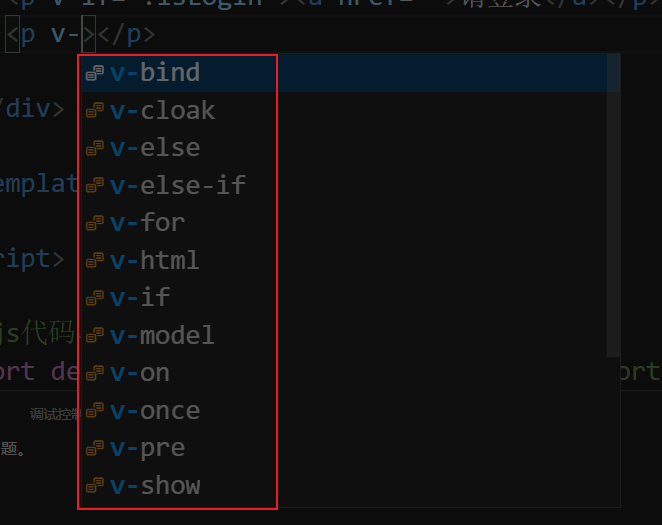
模板语法 指令 v-开头的
条件判断类:
v-if v-show
v-if与v-show的异同点:
同:
都可以隐藏或者显示元素(true:显示、false:不显示)
异:
if不渲染DOM,如果if为false,在浏览器中不显示
show渲染DOM,如果show都为false,在浏览器中将元素设置为display:one
显示列表与制表类: v-for 这个for啊,极有可能是遍历,循环的意思
记忆方式:v-for:冒号里面A of B,然后A有括号,括号内两个参数不带引号。
1 <li v-for="(fruit,index) of fruits" :key="index">
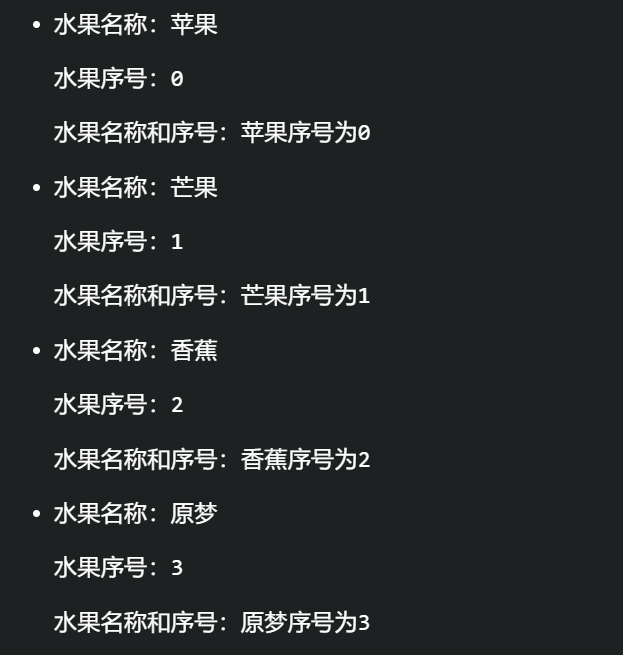
利用v-for指令显示列表 1 2 3 4 5 6 7 8 9 10 11 12 13 14 15 16 17 18 19 20 21 22 23 24 <template > <div id ="app" > <ul > <li v-for ="(fruit,index) of fruits" :key ="index" > <p > 水果名称:{{fruit}}</p > <p > 水果序号:{{index}}</p > <p > 水果名称和序号:{{fruit}}序号为{{index}}</p > </li > </ul > </div > </template > <script > export default { data ( return { fruits :["苹果" ,"芒果" ,"香蕉" ,"原梦" ] } } } </script >
显示结果:
可以看出就像是一个遍历呢,
一长串如何记住呢?
1 2 3 v-for="(fruit,index) of fruits" :key="index" 元素索引属于集合,key的值为索引,然后将这个元素放在{{}}中
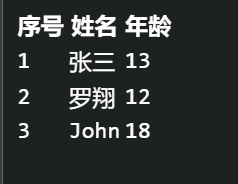
利用v-for制表 1 2 3 4 5 6 7 8 9 10 11 12 13 14 15 16 17 18 19 20 21 22 23 24 25 26 27 28 29 30 31 32 33 34 35 36 37 38 39 40 41 42 43 44 45 46 47 48 <template > <div > <table > <thead > <th > 序号</th > <th > 姓名</th > <th > 年龄</th > </thead > <tbody > <tr v-for ="(v,i) of students" :key ="i" > <td > {{i + 1}}</td > <td > {{v.name }}</td > <td > {{v.age}}</td > </tr > </tbody > </table > </div > </template > <script > export default { components :{Hello,MenuList}, data ( return { students :[ {name :"张三 " ,age :13 }, {name :"罗翔 " ,age :12 }, {name :"John " ,age :18 } ] } } } </script > <style > </style >
演示效果:
组件嵌套 组件A想要用组件B 的功能,然后需要把组件B嵌套在A中。
三步走:命名、注册、传值
组件命名 B组件命名要首字母大写(小写可能会很HTML标签冲突,不建议这样写),大驼峰式,后缀.vue
注册组件 在B组件中暴露自己,在A组件中引入B组件
1 import B from "./components/B.vue";
在A中注册组件B,需要在A中写
最后就是将B组价作为A组件的标签,放入A中:
组件传值 父子级的概念是,A组件如果包含B组件标签,则称A是B 的父级。
父级向子级传递数据 格式是属性传递(所以用双花括号来表达数据,用:来绑定标签)
首先需要在父级中单向引入子级
然后需要在子级中加入props属性
props是个字符串数组,里面的值为父级传过来的属性名
App.vue为父级
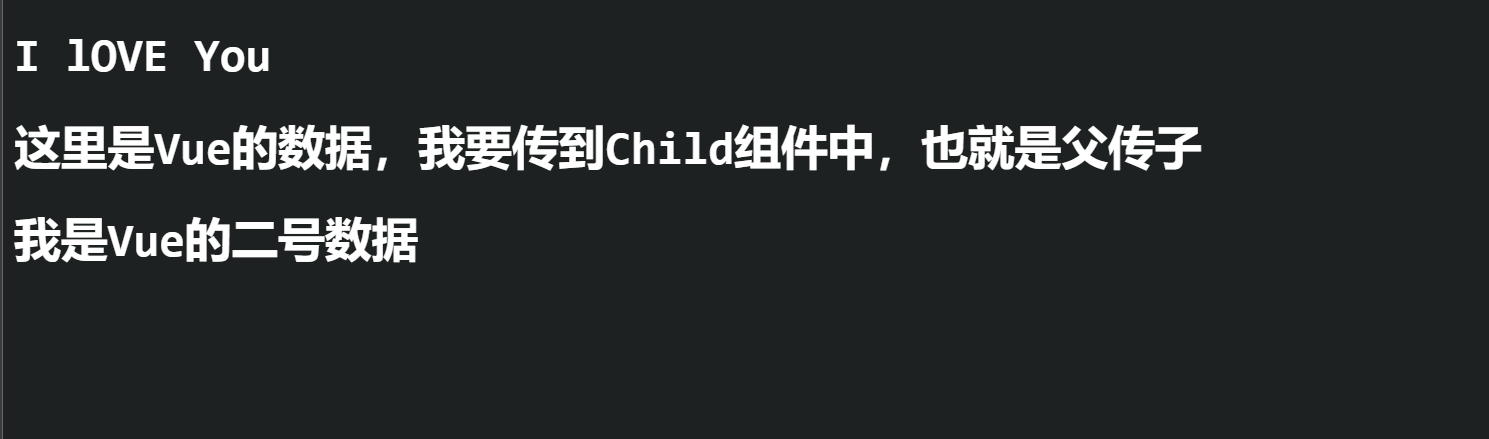
1 2 3 4 5 6 7 8 9 10 11 12 13 14 15 16 17 18 19 20 21 22 23 24 25 26 27 28 29 30 31 32 33 34 35 36 37 38 39 40 41 42 43 44 45 46 47 48 <template > <div > <h1 > I lOVE You</h1 > <Child :msg ="message" > </Child > <Child :mag ="message1" > </Child > </div > </template > <script > import Child from "./components/Child.vue" export default { components :{Child}, data ( return { message :"这里是Vue的数据,我要传到Child组件中,也就是父传子" , message1 :"我是Vue的二号数据" } } } </script > <style > </style > <template > <div > <h1 > {{msg}} {{mag}}</h1 > </div > </template > <script > export default { props : ["msg" ,"mag" ], data ( return { } } } </script >
效果图:
子级向父级传递数据 格式是事件传递(@来绑定标签)
比如说我现在想写一个功能,一个子级的按钮button,点击它的时候,把子级的数据传递给父级,然后父级的数据变成子级的一个数据。
先在父级中定义一个自定义事件,然后在子级定义一个按钮,然后绑定点击按钮(@click)发生的方法,在子级中定义这个方法,然后在这个方法中调用方法
1 this.$emit("toParent", this.msg);
其中
1 2 3 4 5 //$emit方法可以触发父级(App.vue)的自定义事件,也就是进行了绑定,向自定义事件toParent传递数据 //$emit方法需要两个参数,1、要绑定的父级中的自定义事件,2、所要传递是数据 //可以这样理解,因为我在App中的Child标签中自定义了事件toParent //然后我又在Child中的调用了方法this.$emit,所以App就通过Chlid联系起来了
然后,分别在子级,父级中定义变量,用来存放数据(一般都充当容器的作用),子级的变量用来存放要给父级传递的数据,父级的变量用来接收子级传来的数据。
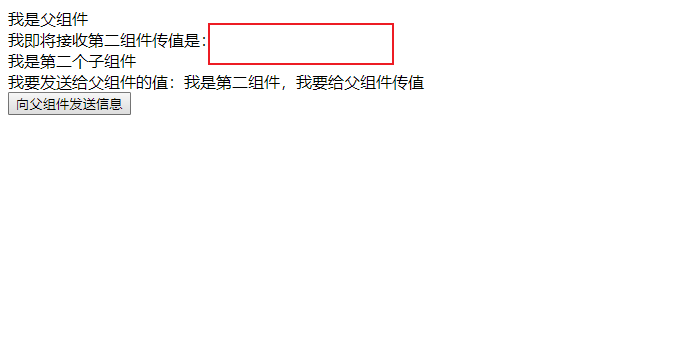
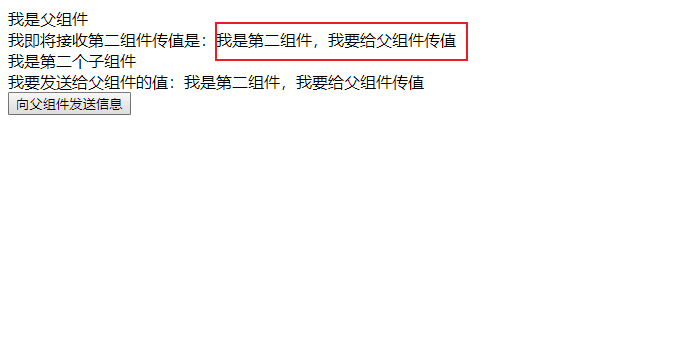
1 2 3 4 5 6 7 8 9 10 11 12 13 14 15 16 17 18 19 20 21 22 23 24 25 26 27 28 29 30 31 32 33 34 35 36 37 38 39 40 41 42 43 44 45 46 47 48 49 50 51 52 53 54 55 56 57 <template > <div > <div > 我是父组件</div > <div > 我即将接收第二组件传值是:{{child2Msg}}</div > <div > <div > <Child @toParent ="getMag" /> </div > </div > </div > </template > <script > import Child from "./components/Child.vue" ;export default { components : { Child }, data ( return { child2Msg : "" }; }, methods : { getMag (msg ) this .child2Msg = msg; } } }; </script > <template > <div > <div > 我是第二个子组件</div > <div > 我要发送给父组件的值:{{msg}}</div > <button @click ="toParent" > 向父组件发送信息</button > </div > </template > <script > export default { data ( return { msg : "我是第二组件,我要给父组件传值" , }; }, methods : { toParent ( this .$emit("toParent" , this .msg); } } }; </script >
效果图:
点击前
点击后
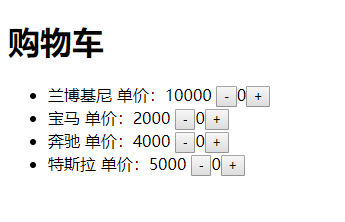
一个父传子,子传父的综合例子:
分析过程:
首先我们创建三个组件App.vue、Carts.vue、Counter.vue,然后
代码:
1 2 3 4 5 6 7 8 9 10 11 12 13 14 15 16 17 18 19 20 21 22 23 24 25 26 27 28 29 30 31 32 33 34 35 36 37 38 39 40 41 42 43 44 45 46 47 48 49 50 51 52 53 54 55 56 57 58 59 60 61 62 63 64 65 66 67 68 69 70 71 72 73 74 75 76 77 78 79 80 81 82 83 84 85 86 87 88 89 90 91 92 93 94 95 96 97 98 99 100 101 102 103 104 105 106 <template > <div > <Carts > </Carts > </div > </template > <script > import Carts from "./components/Carts.vue" export default { components :{ Carts }, data ( return { msg :"" } } } </script > <template > <div > <h1 > 购物车</h1 > <ul > <li v-for ="(v,i) of cars" :key ="i" > {{v.name}} 单价:{{v.price}} <Counter :qu ="v.qu" :index ="i" @sub ="sub" @add ="add" > </Counter > </li > </ul > </div > </template > <script > import Counter from "./Counter.vue" export default { components :{Counter}, data ( return { qu :0 , cars :[ {name :"兰博基尼" ,price :10000 ,qu :0 }, {name :"宝马" ,price :2000 ,qu :0 }, {name :"奔驰" ,price :4000 ,qu :0 }, {name :"特斯拉" ,price :5000 ,qu :0 }, ] } }, methods :{ sub (index ) if (this .cars[index].qu==0 ){ alert("数量不可为0哦!" ) } else { this .cars[index].qu--; } }, add (index ) this .cars[index].qu++; } } } </script > <template > <span > <button @click ="sub" > -</button > <span > {{qu}}</span > <button @click ="add" > +</button > </span > </template > <script > export default { props :["qu" ,"index" ], data ( return { } }, methods :{ sub ( this .$emit("sub" ,this .index); }, add ( this .$emit("add" ,this .index); } } } </script > <style > </style >
效果图:
总结:
非子级之间传递数据 需要定义一个.js文件,里面存放有两个子级文件都需要操作的全局数据与调用的方法,然后在两个子级文件中分别引入这个.js文件。需要注意的是,如何在两个子级文件中表示对js文件中数据与方法的使用。
1 2 3 4 5 6 7 8 9 10 11 12 13 14 15 16 17 18 19 20 21 22 23 24 25 26 27 28 29 30 31 32 33 34 35 36 37 38 39 40 41 42 43 44 45 46 47 48 49 50 51 52 53 54 55 56 57 58 59 60 61 62 63 64 65 66 67 68 69 70 71 72 73 74 75 76 77 78 <template > <div > <Brother > </Brother > <Sister > </Sister > </div > </template > <script > import Brother from "./components/Brother" import Sister from "./components/Sister" export default { components :{Carts,Brother, Sister}, data ( return { } } }; </script > <template > <div > <h1 > brother <button @click ="changeData" > 改变数据</button > </h1 > <p > {{bro.message}}</p > </div > </template > <script > import store from "../store.js" export default { data ( return { bro :store.state } }, methods :{ changeData ( store.setStateMessage("brother data" ) } } } </script > <style > </style > <template > <div > <h1 > sister</h1 > <p > {{sis.message}}</p > </div > </template > <script > import store from "../store.js" export default { data ( return { sis :store.state } } } </script > <style > </style > export default { state:{ message:"Hello Vue" }, setStateMessage(str){ this.state.message = str; } }
在Brother中定义变量bro,然后将js文件中的数据赋值给它,使用时使用bro.message,因为在store.js中已经定义了message,Sister中同理。
在Brother中调用store.js的setStateMessage方法的调用格式为:store.setStateMessage()
计算属性与监听器 计算属性:computed 计算属性要解决的问题就是:
我有一个非常复杂的计算表达式,直接将这个表达式放在标签里显得很乱,很复杂。我们为了简洁好看,将这个表达式用花括号{}包装起来,然后给它起个名字,加个参数,它就变成了一个方法了,然后把这个方法放在computed:{ }里面,然后在标签里面如何调用这个非常复杂的计算表达式呢?那就是在双花括号里面写入方法的名字。
下面这个例子计算:总价=单价×数量×折扣
1 2 3 4 5 6 7 8 9 10 11 12 13 14 15 16 17 18 19 20 21 22 23 24 25 26 27 28 29 30 31 32 33 34 35 36 37 38 39 40 41 42 43 44 45 <template > <div id ="app" > <h1 > {{message}}</h1 > <p > 单价{{price}}</p > <p > 数量 <button @click ="sub" > -</button > <span > {{quatity}}</span > <button @click ="add" > +</button > </p > <p > 折扣 {{discount}}</p > <h2 > 总价:{{totalPrice}}</h2 > </div > </template > <script > export default { data ( return { message :"Hello world" , price :99 , quatity :0 , discount :0.5 } }, computed :{ totalPrice ( return this .price*this .quatity*this .discount } }, methods :{ sub ( this .quatity-- }, add ( this .quatity++ } } } </script > <style > </style >
监听器:watch 监听器就是监听一个值,然后把这个值变化之后的值传到一个方法里面,方法的名字就是这个值的名字,方法的内容往往是对这个值变化之后的值进行一系列的计算。
例如:监听器要监听value的值,然后就把val变化之后的值传到value(val){ },其中val是value变化后的值。
1 2 3 4 5 6 7 8 9 10 11 12 13 14 15 16 17 18 19 20 21 22 23 24 25 26 27 28 29 30 31 32 33 34 35 36 37 38 39 40 41 42 43 44 45 46 47 48 49 50 <template > <div id ="app" > <h1 > {{message}}</h1 > <p > 单价{{price}}</p > <p > 数量 <button @click ="sub" > -</button > <span > {{quatity}}</span > <button @click ="add" > +</button > </p > <p > 折扣 {{discount}}</p > <h2 > 总价:{{totalPrice}}</h2 > </div > </template > <script > export default { data ( return { message :"Hello world" , price :99 , quatity :0 , discount :0.5 , totalPrice :0 } }, watch :{ quatity (qu ) this .totalPrice = this .price * qu * this .discount } }, methods :{ sub ( this .quatity-- }, add ( this .quatity++ } } } </script > <style > </style >
计算属性与监听器的区别 多个值 改变,为了得到一个值 的结果,一般用计算属性(computed)
一个值 的改变,会引起多个值 的改变,一般用监听器(watch)
实际开发中,大部分时候用computed属性,性能也比较好
但是在用到路由的时候,只能用监听器。
生命周期钩子(方法) 作用: 让页面初始化加载的时候就有调用方法呈现出相应的数据来
不论在文档中的顺序如何,在浏览器中都是先执行created中的方法,再执行mounted中的方法
如何要修改一些html中标签的内容,我们需要在mounted方法中修改,而不是在created中,因为created方法是先生成html的一些模板
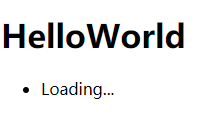
一个栗子:
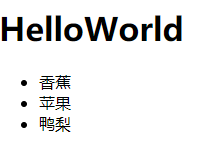
先在页面加载完成时显示Loading…然后两秒之后显示“香蕉,苹果,鸭梨”
1 2 3 4 5 6 7 8 9 10 11 12 13 14 15 16 17 18 19 20 21 22 23 24 25 26 27 28 29 30 31 32 33 34 35 36 37 38 39 40 41 42 <template > <div id ="app" > <h1 > HelloWorld</h1 > <ul > <li v-for ="(item,index) of fruitList" :key ="index" > {{item}} </li > </ul > </div > </template > <script > export default { data ( return { fruitList :["Loading..." ] } }, created ( this .getData(); }, methods :{ getData ( setTimeout (()=> { this .fruitList = ["香蕉" ,"苹果" ,"鸭梨" ] },2000 ) } } } </script > <style > </style >
显示结果:
插槽、DOM操作、过滤器 插槽 将slot标签 放在要复用的组件中
代码:
1 2 3 4 5 6 7 8 9 10 11 12 13 14 15 16 17 18 19 20 21 22 23 24 25 26 27 28 29 30 31 32 33 34 35 36 37 <template > <div id ="app" > <h1 > HelloWorld</h1 > <HelloWorld > 注册</HelloWorld > <HelloWorld > 提交</HelloWorld > </div > </template > <script > import HelloWorld from "./components/HelloWorld.vue" export default { components :{HelloWorld}, data ( return { } } } </script > <style > </style > <template > <button > <slot > </slot > </button > </template > <script > </script > <style > </style >
具名插槽 有具体名字的插槽?
DOM操作 在Vue中我们一般是使用ref来获取真实DOM
1 2 3 4 5 6 7 8 9 10 11 12 13 14 15 16 <template > <div id ="app" > <div ref ="box" > hello world</div > </div > </template > <script > let box = document .querySelector("#box" ) let style = window .getComputedStyle(box); console .log(style.height) </script >
Vue开发中一般不需要获取真实DOM的
过滤器 通过固定算法重新整理数据
Vue3.x已将过滤器删除,建议以后用方法或者计算属性代替
表单 作用: 通过表单向服务器发送数据
常用控价: 文本输入框(input,text) 下拉菜单(select,option)
用到的技术点: 数据双向绑定: 通过v-model指令在文本输入框中(input标签中)对数据进行双向绑定
传统的前端代码进行表单提交的时候需要在form标签内写入跳转路径和提交方法,而在Vue中我们使用ajax来实现表单的提交,也就是通过异步数据交换的方式来实现,使用Vue无须进行跳转与刷新,但是需要用到(prevent),所以但是需要在Vue中的form标签中需要绑定事件(@submit).
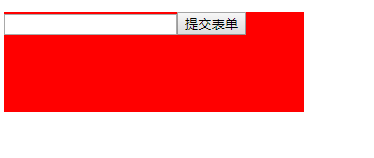
1 2 3 4 5 6 7 8 9 10 11 12 13 14 15 16 17 18 19 20 21 22 23 24 25 26 27 28 29 30 31 32 33 34 35 36 37 <template > <div id ="app" > <h1 > {{message}}</h1 > <form @submit.prevent ="postData" > <input type ="text" v-model ="message" > <button > 提交表单</button > </form > </div > </template > <script > export default { data ( return { message : "" } }, methods :{ postData ( console .log(this .message) } } } </script > <style > div { width : 300px ; height : 100px ; background-color : red; } </style >
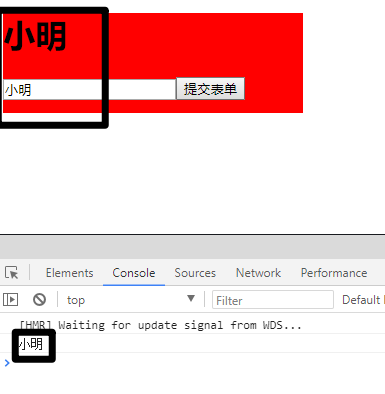
上述代码绑定了变量message与文本输入框的数据(text),在文本输入框中输入数据,便会在输入框上方呈现出来。
输入前:
输入后:
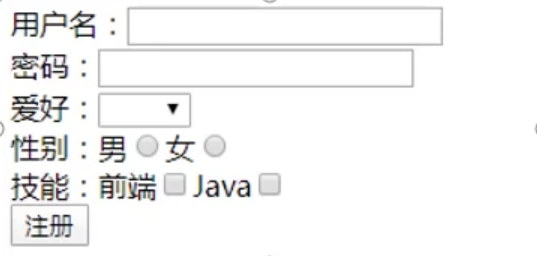
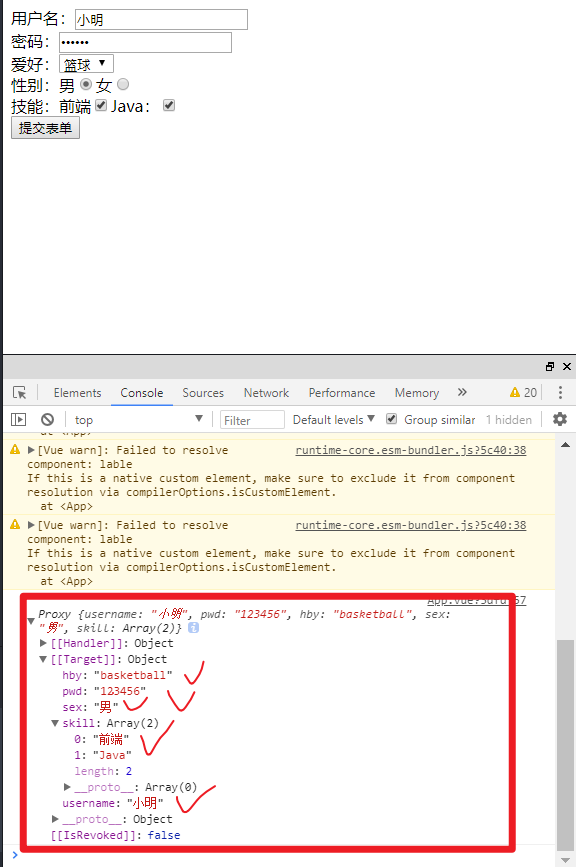
表单案例: 要求:提交表单并且在控制台输出
源程序: 1 2 3 4 5 6 7 8 9 10 11 12 13 14 15 16 17 18 19 20 21 22 23 24 25 26 27 28 29 30 31 32 33 34 35 36 37 38 39 40 41 42 43 44 45 46 47 48 49 50 51 52 53 54 55 56 57 58 59 60 61 62 63 64 65 66 67 68 69 70 71 <template > <div id ="app" > <form @submit.prevent ="postData" > <div > <lable > 用户名:</lable > <input type ="text" v-model ="formData.username" > </div > <div > <lable > 密码:</lable > <input type ="password" v-model ="formData.pwd" > </div > <div > <label for ="" > 爱好:</label > <select v-model ="formData.hby" > <option value ="football" > 足球</option > <option value ="basketball" > 篮球</option > </select > </div > <div > <lable > 性别:</lable > <label for ="" > 男</label > <input type ="radio" value ="男" v-model ="formData.sex" > <label for ="" > 女</label > <input type ="radio" value ="女" v-model ="formData.sex" > </div > <div > <label for ="" > 技能:</label > <label for ="" > 前端</label > <input type ="checkbox" value ="前端" v-model ="formData.skill" > <label for ="" > Java:</label > <input type ="checkbox" value ="Java" v-model ="formData.skill" > </div > <button > 提交表单</button > </form > </div > </template > <script > export default { data ( return { formData : { username :"" , pwd :"" , hby :"" , sex :"" , skill :[] } } }, methods :{ postData ( console .log(this .formData) } } } </script > <style > </style >
建议每一行都放在单独的一层中,label用于标记名称,对于单选框和复选框,都需要添加value属性,单选框属性为radio;复选框属性为checkbox,所有的数据建议放在一个对象当中(formData)
数据交互 作用: 知识点回顾
http协议:
方法:增加(POST)、删除(DELET3)、更新(PUT)、查看(GET)
ajax:不刷新和后台进行数据交互,文档
axios:与后台交互数据,对ajax进行封装,一般用方法的形式表示,官方文档
koa:基于node.js下的的一个web框架,官方文档
做数据交互,即需要前台,也需要后台
这时候需要安装axios与koa
安装axios:
只需要在项目对应的目录下使用命令:
1 cnpm install --save axios
安装koa:
详情查看廖雪峰的koa入门
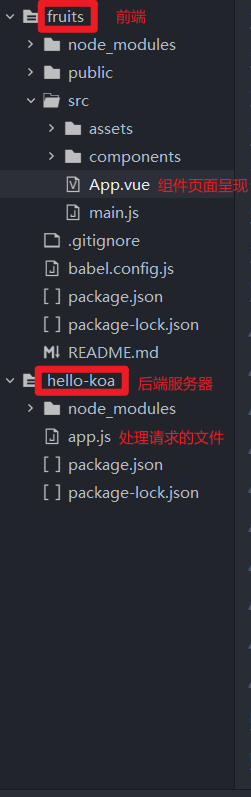
先创建项目文件夹hello-koa,创建一个app.js在里面写入如下代码:
1 2 3 4 5 6 7 8 9 10 11 12 13 14 15 16 const Koa = require ('koa' );const app = new Koa();app.use(async (ctx, next) => { await next(); ctx.response.type = 'text/html' ; ctx.response.body = '<h1>Hello, koa2!</h1>' ; }); app.listen(3000 ); console .log('app started at port 3000...' );
接下来有两种安装方法:
第一种
创建项目文件夹hello_koa,直接在项目目录下使用命令:
此命令会把koa以及koa所依赖的所有的包安装在当前目录下的node_model目录中
第二种
在hello-koa中创建一个package.json文件,在其中写入如下代码:(注意,需要把自己需要的依赖写入.json文件)
1 2 3 4 5 6 7 8 9 10 11 12 13 14 15 16 17 18 19 20 21 22 { "name" : "hello-koa2" , "version" : "1.0.0" , "description" : "Hello Koa 2 example with async" , "main" : "app.js" , "scripts" : { "start" : "node app.js" }, "keywords" : [ "koa" , "async" ], "author" : "Michael Liao" , "license" : "Apache-2.0" , "repository" : { "type" : "git" , "url" : "https://github.com/michaelliao/learn-javascript.git" }, "dependencies" : { "koa" : "2.0.0" } }
然后在项目目录下使用命令:npm install就安装好了。
源代码: 主要有两个文件,一个前端的App.vue 和一个服务器的app.js
1 2 3 4 5 6 7 8 9 10 11 12 13 14 15 16 17 18 19 20 21 22 23 24 25 26 27 28 29 30 31 32 33 34 35 36 37 38 39 40 41 42 43 44 45 46 47 48 49 50 51 52 53 54 55 56 57 58 59 60 61 62 63 64 65 66 <template > <div id ="app" > <h1 > 水果</h1 > <form @submit.prevent ="postData" > <input type ="text" v-model ="fruit" > <button > 添加</button > </form > <ul > <li v-for ="(item,index) of fruitList" :key ="index" > {{item}} <button @click ="del(index)" > 删除</button > </li > </ul > </div > </template > <script > import axios from "axios" ;export default { data ( return { fruit :"" , fruitList :[], } }, created ( this .getFruitList(); }, methods :{ getFruitList ( axios.get("http://localhost:3000/fruits" ).then(res => this .fruitList = res.data }) }, postData ( axios.post("http://localhost:3000/fruits" ,{ fruit : this .fruit }).then(res => this .getFruitList(); }) }, del (index ) axios.delete(`http://localhost:3000/fruits/${index} ` ) .then(res => this .getFruitList(); }) } } } </script > <style > </style >
1 2 3 4 5 6 7 8 9 10 11 12 13 14 15 16 17 18 19 20 21 22 23 24 25 26 27 28 29 30 31 32 33 34 35 const Koa = require ("koa" );const parser = require ("koa-parser" ); const router = require ("koa-router" )(); const cors = require ('koa-cors' ); const app = new Koa();app.use(cors()); app.use(parser()); app.use(router.routes()); const fruitList = ["香蕉" ,"苹果" ,"pear" ];router.get("/fruits" ,async ctx => { ctx.body = fruitList; }) router.post("/fruits" ,async ctx => { let fruit = ctx.request.body.fruit; fruitList.push(fruit); ctx.body = true ; }) router.delete("/fruits/:index" ,async ctx =>{ let index = ctx.params.index; fruitList.splice(index,1 ); ctx.body = true ; }) app.listen(3000 ,() => { console .log("servr is running!" ) })
启动流程:先要在node下运行app.js文件,打开端口3000的服务器,然后打开vue的服务器8080端口,然后就可以在页面上看到显示结果。
相关报错 1、我在安装的过程中遇到一个小问题:我使用的安装方法是第二种,但是我的app.js文件中有如下代码:
1 2 3 const parser = require ("koa-parser" ); const router = require ("koa-router" )(); const cors = require ('koa-cors' );
但是运行的时候报错了,先报了Error: Cannot find module 'koa-parser'我去网上搜了一大圈,没找到解决方法,然后我就觉得这应该是依赖问题,然后我就试着在项目目录下用cmd打开敲了命令npm install koa-parser,然后等它安装好之后,我又运行了一次,发现还是报错,不过这次报的错变成了Error: Cannot find module 'koa-router'然后我结合代码发现了问题所在,就是我们用第二种方法安装koa及其依赖的时候安装的是最基础的一些内容,如果你的代码中要引入一些其他依赖,那还得在cmd一个一个安装,或者就是在packa.json中写入依赖,然后一次安装。
2、在文件中写箭头函数报错'res' is defined but never used
原因:eslint的验证语法
解决方案:在错误语句后面添加注释:
项目实战经验:
对axios进一步封装,使得开发中发送请求更加轻松
在前端程序中,我们可以看到几乎都是用axios调用方法,我们可以将axios提取出来。
通过vue配置文件,设置项目开发和部署项目的无缝切换
前端程序还写了很多路径,这些路径是在开发过程中的路径,如果我们要将项目部署在真实的环境上,一个个改,肯定费力不讨好,所以可以通过配置文件来修改。
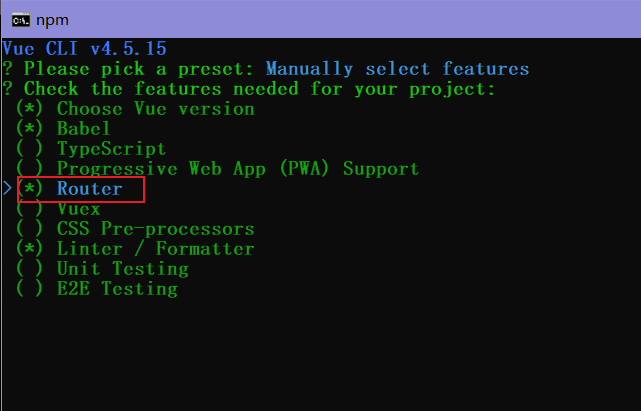
总结: 路由 作用: 现页面的跳转功能
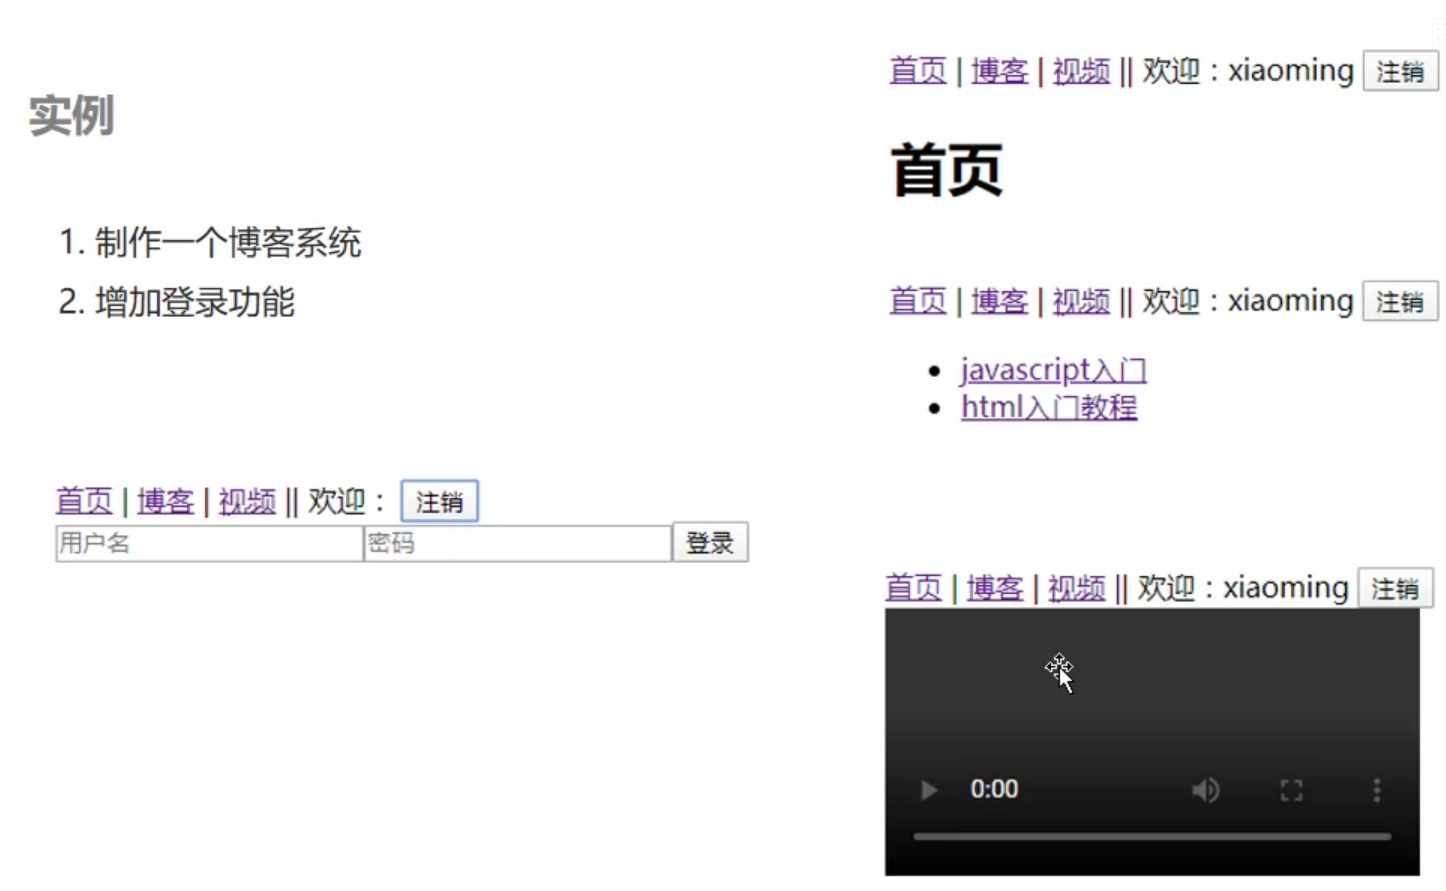
实例: 思路与问题:
登录要跳转到首页,而且还要显示欢迎:用户名的字样:怎么操作?
既然要显示用户名,那肯定要先找个变量把用户名存起来 啊,那就是用v-model实现数据双向绑定,然后将这个值存放在,本地存储 中,
如何获取这个值存下来?存在哪儿?
也就是使用localStorage对象的一个方法setItem("usr",this.username),这方法有两个参数,第一个是简写,第二个是你要往第一个参数中存的变量或者值。然后我们可以在其他页面localStorage.getItem("usr")就可以拿到存起来的用户名了。
那么我们点击登录的时候,还要进行跳转页面到首页,这时候怎么操作?
这时候vue的路由提供了一个叫编程式导航的一个功能,通过this.$router.push("/")来跳转到首页。
确实可以跳转,但是需要刷新才能获取到数据,为什么需要刷新呢?如何解决这个问题?
因为:刷新是因为vue的路由跟a标签的跳转不是一回事,vue的路由刷新一次才能获取到localStorage的数据。
解决方法: 使用侦听器(watch),它可以侦听路由,当页面路径发生变化的时候就执行相应的操作。
如何实现点击注销按钮清除欢迎:用户名,并且跳转到登录页面的功能?
在注销按钮上绑定事件logout,然后在logout方法中调用清空本地存储的方法localStorage.clear();实现跳转页面还是调用this.$router.push("/login")跳转到登录页面。
大概功能已经完善,但是有个逻辑问题,就是我们在没有登录的时候按理来说是不能访问到首页、博客、视频的但是现在却可以访问,如何解决这个问题呢?
答案是使用导航守卫 ,它可以改变路由的跳转,可以在index.js中用 router.beforeEach 注册一个全局前置守卫:
1 2 3 4 5 6 router.beforeEach((to, from , next ) => { })
跳转的路径不等于/login并且还没登录那就不让你看呗。
还有一个逻辑问题就是,按理来说我们没有登录的时候是不显示欢迎:字样的,但是现在不登录却可以看到,如何解决这个问题呢?
答案就是使用我们之前的一个指令v-if来隐藏这个字段,并且这个v-if要跟localStorage.getItem()绑定在一起。
1 2 <span v-if ="showUser" > 欢迎:{{username}} <button @click ="logout" > 注销</button > </span > showUser: localStorage.getItem("usr")
还有一个问题是,我们登录之后,它竟然没有显示欢迎:用户名的字样,需要刷新才可以显示,如何解决这个问题?
这个问题的答案跟第四个问题的答案相似,就是我们在第7个问题那里只是绑定了数据,但是没有将这个数据放在侦听器(watch)中,所以登录的一瞬间不会显示出来,所以只需要将localStorage.getItem("usr")赋值给showUser然后放入watch中就行。
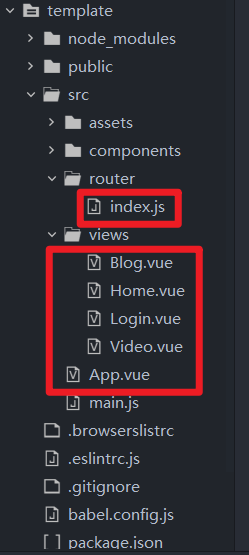
源程序:
index.js
1 2 3 4 5 6 7 8 9 10 11 12 13 14 15 16 17 18 19 20 21 22 23 24 25 26 27 28 29 30 31 32 33 34 35 36 37 38 39 40 41 42 43 44 45 46 47 48 49 50 51 52 import { createRouter, createWebHistory } from 'vue-router' import Home from '../views/Home.vue' import Blog from '../views/Blog.vue' import Video from '../views/Video.vue' import Login from '../views/Login.vue' const routes = [ { path : '/' , name : 'Home' , component : Home }, { path : '/blog' , name : 'Blog' , component : Blog }, { path : '/video' , name : 'Video' , component : Video }, { path : '/login' , name : 'Login' , component : Login } ] const router = createRouter({ history : createWebHistory(process.env.BASE_URL), routes }) router.beforeEach((to, from , next ) => { if (to.path !== "/login" ){ if (localStorage .getItem("usr" )){ next(); } else { next("/login" ); } } else { next(); } }) export default router
Home.vue
1 2 3 4 5 6 7 8 9 10 11 12 13 14 15 16 17 18 <template > <div class ="home" > <h1 > 首页</h1 > <h2 > 欢迎来到{{msg}}的首页</h2 > </div > </template > <script > export default { data ( return { msg :localStorage .getItem("usr" ) } } } </script >
Blog.vue
1 2 3 4 5 6 7 8 9 10 11 12 13 14 15 16 17 <template > <div class ="blog" > <h1 > 博客</h1 > <ul > <li > <router-link to ="" > JavaScript教程</router-link > </li > <li > <router-link to ="" > Java教程</router-link > </li > <li > <router-link to ="" > Python教程</router-link > </li > </ul > </div > </template >
Login.vue
1 2 3 4 5 6 7 8 9 10 11 12 13 14 15 16 17 18 19 20 21 22 23 24 25 26 27 28 29 30 31 32 33 34 35 <template > <div > <form @submit.prevent ="doLogin" > <div > <label for ="" > 用户名:</label > <input type ="text" v-model ="username" > <br > <label for ="" > 密码:</label > <input type ="password" > <button > 登录</button > </div > </form > </div > </template > <script > export default { data ( return { username :"" } }, methods :{ doLogin ( console .log(this .username), localStorage .setItem("usr" ,this .username); this .$router.push("/" ); } } } </script > <style > </style >
Video.vue
1 2 3 4 5 6 7 8 9 10 11 12 13 <template > <div class ="video" > <h1 > 视频</h1 > <video src ="../assets/1.mp4" controls ="" > </video > </div > </template > <script > </script > <style > </style >
App.vue
1 2 3 4 5 6 7 8 9 10 11 12 13 14 15 16 17 18 19 20 21 22 23 24 25 26 27 28 29 30 31 32 33 34 35 36 37 38 39 40 <template > <div id ="nav" > <router-link to ="/" > 首页</router-link > | <router-link to ="/blog" > 博客</router-link > | <router-link to ="/video" > 视频</router-link > || <span v-if ="showUser" > 欢迎:{{username}} <button @click ="logout" > 注销</button > </span > </div > <router-view /> </template > <script > export default { data ( return { username : localStorage .getItem("usr" ), showUser : localStorage .getItem("usr" ) } }, watch :{ '$route.path' :function ( this .username = localStorage .getItem("usr" ), this .showUser = localStorage .getItem("usr" ) } }, methods :{ logout ( localStorage .clear(); this .$router.push("/login" ) } } } </script > <style > </style >
总结: 这些需要跳转的页面需要在App.vue中以router-link标签标记,而且必须用to属性来填写路径,然后需要在views目录下创建用router-link标签标记的vue文件,然后需要在index.js文件中导入(import),并且定义每一个vue文件对应的路径。
在一个页面当中,我们往往需要进行页面的跳转,但是vue的路由跳转并不会刷新,所以在跳转的时候需要刷新数据的时候我们可以设置监听器(watch),当页面发生跳转的时候进行数据更新。
注意事项:
一系列跳转的并列的页面放在view中
一些可复用的小组件放在components中
当是一个表单的时候,我们的登录按钮就不需要绑定事件了,而是form表单进行@submit绑定。
作用: 一个基于Vue的UI前端框架,可以美化界面,节省开发时间
安装:
使用命令行:npm i element-ui -S进行安装
配置:
在 main.js 中写入以下内容:(这是vue2.x版本)
1 2 3 4 5 6 7 8 9 10 11 import Vue from 'vue' ;import ElementUI from 'element-ui' ;import 'element-ui/lib/theme-chalk/index.css' ;import App from './App.vue' ;Vue.use(ElementUI); new Vue({ el : '#app' , render : h => });
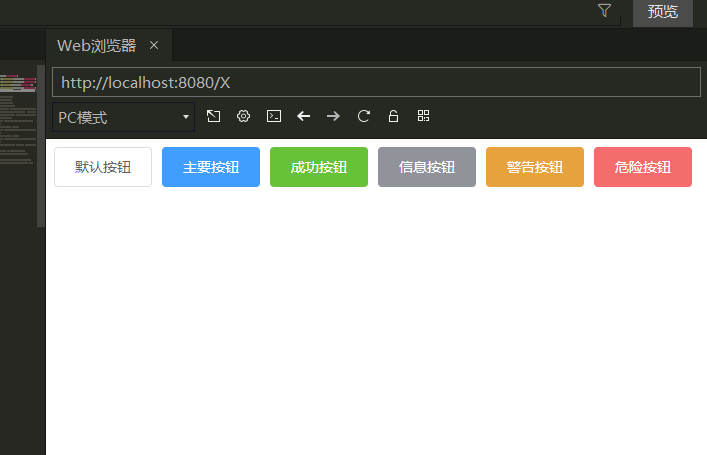
案例: 在App.vue的template中添加ElementUI的标签,就可以显示EUI的UI界面了。
赋值粘贴EUI的按钮程序到App.vue:
1 2 3 4 5 6 7 8 <el-row > <el-button > 默认按钮</el-button > <el-button type ="primary" > 主要按钮</el-button > <el-button type ="success" > 成功按钮</el-button > <el-button type ="info" > 信息按钮</el-button > <el-button type ="warning" > 警告按钮</el-button > <el-button type ="danger" > 危险按钮</el-button > </el-row >
执行结果:
所以接下来的开发任务就比较简单了,根据自己的需求或者喜好来选择不同的UI界面风格,UI界面确定好之后,然后在程序中根据要求添加相关的功能:模板语法、计算属性、侦听器、生命周期钩子、插槽、表单、数据交互、路由啊,最后部署项目。
表格的表头显示问题
项目部署 如何把Vue项目部署到Web服务器上?且听我慢慢道来。
首先我们在自己的电脑上运行程序,既要有前端,还要有后台,我们运行前端服务器之前,要先打开后台服务器,再打开前端的。因为这俩服务器有各自的端口号,所以我们在前端的代码中要想访问到后台的服务器,我们就要调用axios的一些方法,然后将后台服务器的URL作为参数传入,这时候前后端就算是通了,但是我们并不能直接在后台服务器上访问到项目文件,按照惯例来讲,一般资源啊,项目文件啊,都是在服务器中的,所以咱还得把项目文件复制到后台服务器目录下,那么如何复制呢?
可以通过命令npm run build来把这个项目文件打包成一个静态文件夹,它的名字叫做dist,然后将里面的内容复制粘贴到服务器(koa),那么复制到哪儿呢?你总得复制到一个文件夹下吧,不能复制过去一盘散沙,所以比如说我这个文件夹叫public,复制完知道后人后台服务器并不知情啊,所以得跟他打个招呼:“好兄弟,我这静态文件都放在你的public目录下了”,那么用代码表示怎么表示呢?就是在后台的js代码中用:
1 const static = require ("koa-static" );
项目也复制过去了,但是还有一个问题啊
后言: 本次教程主要是让介绍Vue常用和比较重要的一些功能和操作,如果大家有兴趣的话,还可以去学习更多Vue相关的高级知识:
Vue原理解析 Vuex:状态管理 [Vue.config.js相关配置(基于webpack)](
参考资料:
【晓舟报告】从零开始学前端-Vue基础教程
Vue官方文档
https://cli.vuejs.org/zh/config/ )